How 360 Environment Textures Deliver Massive Scale for a Fraction of the Performance Cost
By Mira Kapoor | 24 October 2025 | 12 mins read
Table of contents
Table of Contents
In the constant battle between breathtaking visuals and a stable frame rate, what if your most powerful asset wasn't a complex model or a custom shader but the sky itself? This guide is a deep dive into that very asset: the 360 environment texture. We'll unpack how these textures work as the quiet foundation of your world, delivering massive scale and realistic lighting for a fraction of the performance cost of traditional methods. For a creative director, especially in VR, understanding this isn't just a technical detail; it's a strategic advantage that empowers your art team, streamlines your pipeline, and makes your virtual worlds feel truly alive.

Grasp the fundamentals: What are 360 environment textures?
Most people think of textures as digital wallpaper patterns of brick, wood, or metal you tile across a surface. A 360 environment texture is different. It’s not wallpaper for a wall; it’s wallpaper for your entire universe.
Instead of a flat, repeatable image, it’s a spherical or cubic map that wraps around your entire 3D scene. This single texture creates the distant mountains, the clouds overhead, and the city skyline you can’t quite reach. It’s the foundation of your world, creating immersive backgrounds, skyboxes for heavens, and reflection probes that tell a shiny surface what to reflect. Unlike standard textures that define the surface of an object, a 360 texture defines the world that surrounds it.
How textures contribute to game design
So, why is this so important? Because 360 environment textures are the biggest visual cheat code in game design. They accomplish three critical things with almost zero performance cost:
- Establish mood: The difference between a hazy, orange dusk and a crisp, clear morning is immediate, and it’s all driven by the skybox. It’s the fastest way to set the emotional tone of a scene before the player even takes a step.
- Create scale: You can suggest a massive, sprawling world without modeling a single distant object. That mountain range on the horizon? It’s just part of the texture. This creates a sense of place and freedom while keeping your polygon count low.
- Drive realistic lighting: This is the big one, especially for VR. A good 360 texture, particularly an HDR one, doubles as a sophisticated light source. The game engine uses it to cast ambient light and generate accurate reflections, grounding every object in the scene. This technique, known as Image-Based Lighting (IBL), is the secret to making virtual worlds feel believable.
For VR experiences, where performance is non-negotiable and immersion is everything, mastering 360 environment textures isn’t just a good idea—it’s essential. It delivers the highest visual impact for the lowest computational price.
Break down the core mechanics of 360-degree texture mapping
To use these textures effectively, you don’t need to be a 3D artist, but you do need to understand the basic mechanics. It all comes down to how a 2D image gets projected onto a 3D shape, usually a giant sphere or cube that encompasses your game level.
Unpack UV mapping for spheres and skyboxes
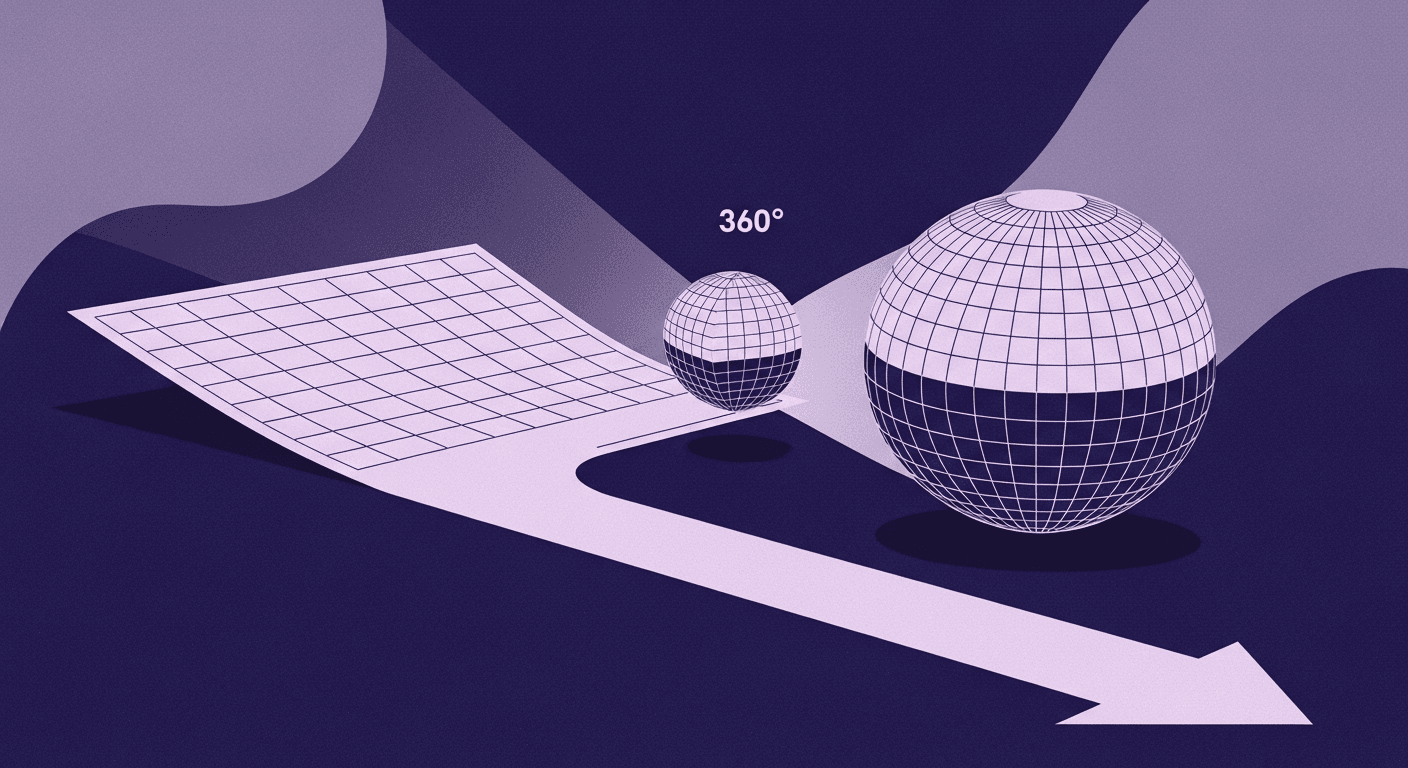
No one wants to wrestle with UV mapping at 2 a.m. But the concept is straightforward. Imagine peeling an orange and trying to lay the peel flat on a table. The flattened peel is your 2D texture, and the process of figuring out how to flatten it without wrinkles or tears is UV mapping.
For a 360 environment, you’re doing the reverse: wrapping that flat peel back around the orange. The UVs are just 2D coordinates that tell the game engine which part of the flat image goes where on the 3D sphere. The challenge your artists constantly face is distortion and seams. Just like on a world map where Greenland looks enormous, a flat projection of a sphere will always have stretching, especially at the top and bottom poles. Acknowledging this pain point helps you understand why your art team spends so much time hiding seams or choosing the right projection format.
Compare key projection types: Equirectangular vs. Cubemaps
Not all 360 textures are created equal. They generally come in two flavors, and choosing the right one has a direct impact on quality and performance.
- Equirectangular: This is the format you’ve seen from 360-degree cameras—a single rectangular image that looks warped and stretched, especially at the top and bottom.
- Pros: It’s easy to create and edit in tools like Photoshop. A huge library of pre-made equirectangular HDRIs is available online.
- Cons: The severe distortion at the poles is computationally expensive for a game engine to resolve in real-time. It can lead to visual artifacts and slower texture rendering.
- Cubemaps: Think of standing inside a cube. A cubemap is simply six square textures, one for each face of the cube (front, back, top, bottom, left, right).
- Pros: This is the format game engines prefer. It has far less distortion, is more efficient for the GPU to process, and produces cleaner reflections. It’s the industry standard for high-quality game environment texturing.
- Cons: It can be slightly more complex to create and edit, as you’re managing six separate images that must align perfectly.
The takeaway is simple: while you might acquire a texture as an equirectangular image, your pipeline should almost always convert it to a cubemap for use in-engine. This single step optimizes your scene for better performance and higher visual fidelity.
Choose your creation method
Now that you know what they are and how they work, where do they come from? You can either create custom 360 environment textures for games or leverage the vast libraries of pre-made assets. The right choice depends on your project’s budget, timeline, and artistic vision.
How to create 360 environment textures for games
There are three primary paths to creating a custom world:
- Photogrammetry: This involves stitching together real-world photographs to create a photorealistic 360-degree image. Using a DSLR on a panoramic tripod head or a dedicated 360 camera, you can capture a location and turn it into a digital asset. It’s the go-to method for achieving maximum realism.
- Procedural generation: Tools like Substance Designer, Texturly, or Houdini allow artists to generate entire environments from mathematical rules. This is perfect for creating alien worlds, fantasy landscapes, or highly customized skies that would be impossible to photograph. It offers unlimited control and resolution.
- Digital painting: For stylized projects, nothing beats a hand-painted skybox. Artists can paint directly onto a cubemap layout in Photoshop or Procreate to create a unique, illustrative feel that perfectly matches the game’s art direction. Think of the beautiful Ghibli-esque skies in games like The Legend of Zelda: Breath of the Wild.
Find and evaluate high-quality pre-made assets
Often, the smartest move is to use a pre-made asset. It saves time and gives you access to professionally captured environments. Sites like Poly Haven (formerly HDRI Haven) are invaluable resources. But you need to know what to look for:
- Resolution: How detailed is the texture? 2K (2048x1024) is a minimum, 4K is a solid standard, and 8K is great for high-end PC or console titles. Just remember, higher resolution means higher memory usage.
- Dynamic range (HDR vs. LDR): This is the most critical factor. An LDR image (like a JPEG) is just a pretty picture. An HDR (High Dynamic Range) image, typically in .hdr or .exr format, contains actual light intensity data. It knows how much brighter the sun is than the blue sky. This data is what fuels realistic Image-Based Lighting. Always use HDR textures for your environments.
- Licensing: Check the usage rights. A Creative Commons (CC0) license, like those on Poly Haven, means you can use it freely in commercial projects without attribution. Getting this wrong can cause major headaches down the line.
Implement textures in your game design pipeline
Once you have your texture, you need to plug it into your project. This is more than a technical step; it’s about integrating the environment into your game design and texture techniques to create a cohesive and believable world.
Apply textures in a game engine (Unity/Unreal)
In an engine like Unity or Unreal, you don’t just apply the texture to an object. You typically create a specific type of material, often called a Skybox or Skylight material. You feed your cubemap into this material, and the engine takes care of projecting it onto a virtual dome or cube that surrounds your scene.
But here’s where the magic happens. The engine uses that texture to power Image-Based Lighting (IBL). It analyzes the HDR data from your skybox and treats it like a complex, real-world light source.
- The bright sun in the texture will cast harsh, direct light.
- The soft blue of the sky will cast cool, ambient light into the shadows.
- Every reflective surface, from a chrome bumper to the character’s eyes, will reflect a stunningly accurate version of the surrounding world.
This is how you make your 3D models feel like they belong in the scene, rather than looking like they’re floating in a void. The skybox isn't just a background; it's the primary light source that ties your entire visual presentation together.
Avoid common visual and workflow bottlenecks
A poor pipeline can turn a great asset into a visual mess. Here are the issues to watch out for:
- Visible seams: If the edges of a cubemap don't align perfectly, you'll see distracting lines in the sky. This is often solved with better tools or artist training.
- Lighting mismatches: If your skybox shows a cloudy day but your main directional light is a harsh, sunny yellow, the illusion is instantly broken. The lighting from the skybox and the other lights in the scene must be in sync.
- Resolution artifacts: In VR, the player is essentially wearing a screen on their face. A low-resolution skybox will look blurry and pixelated, instantly pulling them out of the experience.
The most effective tip? Establish a standardized pipeline for color space (e.g., ACES) and exposure from the very beginning. This ensures that an asset looks the same in Substance Painter, Maya, and Unreal Engine, eliminating guesswork and saving countless hours of rework.
Optimize for performance and realism
Finally, it all comes down to the eternal balancing act of 3D game graphics: making your world look incredible without tanking the frame rate. For game environment design, especially in VR, every millisecond counts.
Balance fidelity and frame rates
That stunning 8K HDR texture you downloaded? It can consume hundreds of megabytes of video memory (VRAM). This is a huge deal. VRAM is a finite resource, and when it runs out, performance grinds to a halt.
Here’s how to manage it:
- Choose the right resolution: Does your skybox really need to be 8K, or would a well-compressed 4K texture do the job? Test it. The answer often depends on how much fine detail is visible.
- Leverage compression: This is your best friend. Modern game engines use powerful, GPU-native texture compression formats (like BC6H for HDR textures) that drastically reduce the memory footprint with very little loss in visual quality. Work with your technical artists to ensure you’re using the right compression settings for your target platform.
Your goal is to find the sweet spot, the lowest resolution and highest compression that still delivers the artistic vision. It’s a decision that requires both technical understanding and a good creative eye.
Use techniques for realistic game environment textures
Beyond performance, two things separate a good environment from a great one: lighting and cohesion.
- Embrace high dynamic range (HDR): We've mentioned it before, but it bears repeating. Using an HDR texture is the single most important technique for achieving photorealistic lighting. It’s the data within the image that allows a Physically-Based Rendering (PBR) workflow to function correctly. Without it, your lighting will always look flat and fake.
- Ensure artistic cohesion: The most technically perfect, photorealistic sky will look completely out of place in a stylized, cartoon world. The art style of your 360 environment textures its color palette, the softness of its shadows, and the level of detail must perfectly match the foreground assets. The sky isn’t a separate element; it’s part of a unified whole. Establish a clear art direction and ensure that every asset, from the smallest prop to the sky itself, serves that vision.
The sky isn't just a texture, it's a strategy
So, a 360 environment texture isn't just another asset. We’ve unpacked the projections, the pipelines, and the performance trade-offs, moving it from a simple background image to a core pillar of your world.
Think of it less as a digital backdrop and more as the artistic and technical anchor for your entire scene. It dictates the mood before a single character moves. It’s the light source that makes every other object feel like it truly belongs. It creates a sense of massive scale without costing you a single polygon.
And for you, that understanding is leverage. You’re no longer just approving a skybox; you’re directing the emotional core of an experience. You can ask smarter questions about HDR compression and memory budgets, bridging the gap between your art and engineering teams. You’re better equipped to make the tough calls that balance stunning visuals with a rock-solid frame rate, especially in VR, where every millisecond counts.
Ultimately, the sky isn’t the limit. It’s the foundation.

Mira Kapoor
Mira leads marketing at Texturly, combining creative intuition with data-savvy strategy. With a background in design and a decade of experience shaping stories for creative tech brands, Mira brings the perfect blend of strategy and soul to every campaign. She believes great marketing isn’t about selling—it’s about sparking curiosity and building community.
Latest Blogs

DIY Textile Texture Techniques That Make Digital Designs Come Ali...
Fabric textures
Texture creation

Max Calder
Dec 8, 2025

Cost vs. Quality: A Decision Framework for PBR Textures
PBR textures
3D textures

Mira Kapoor
Dec 5, 2025

From Faking Light to Simulating Physics: PBR vs Traditional Mater...
PBR textures
3D textures

Max Calder
Dec 3, 2025
