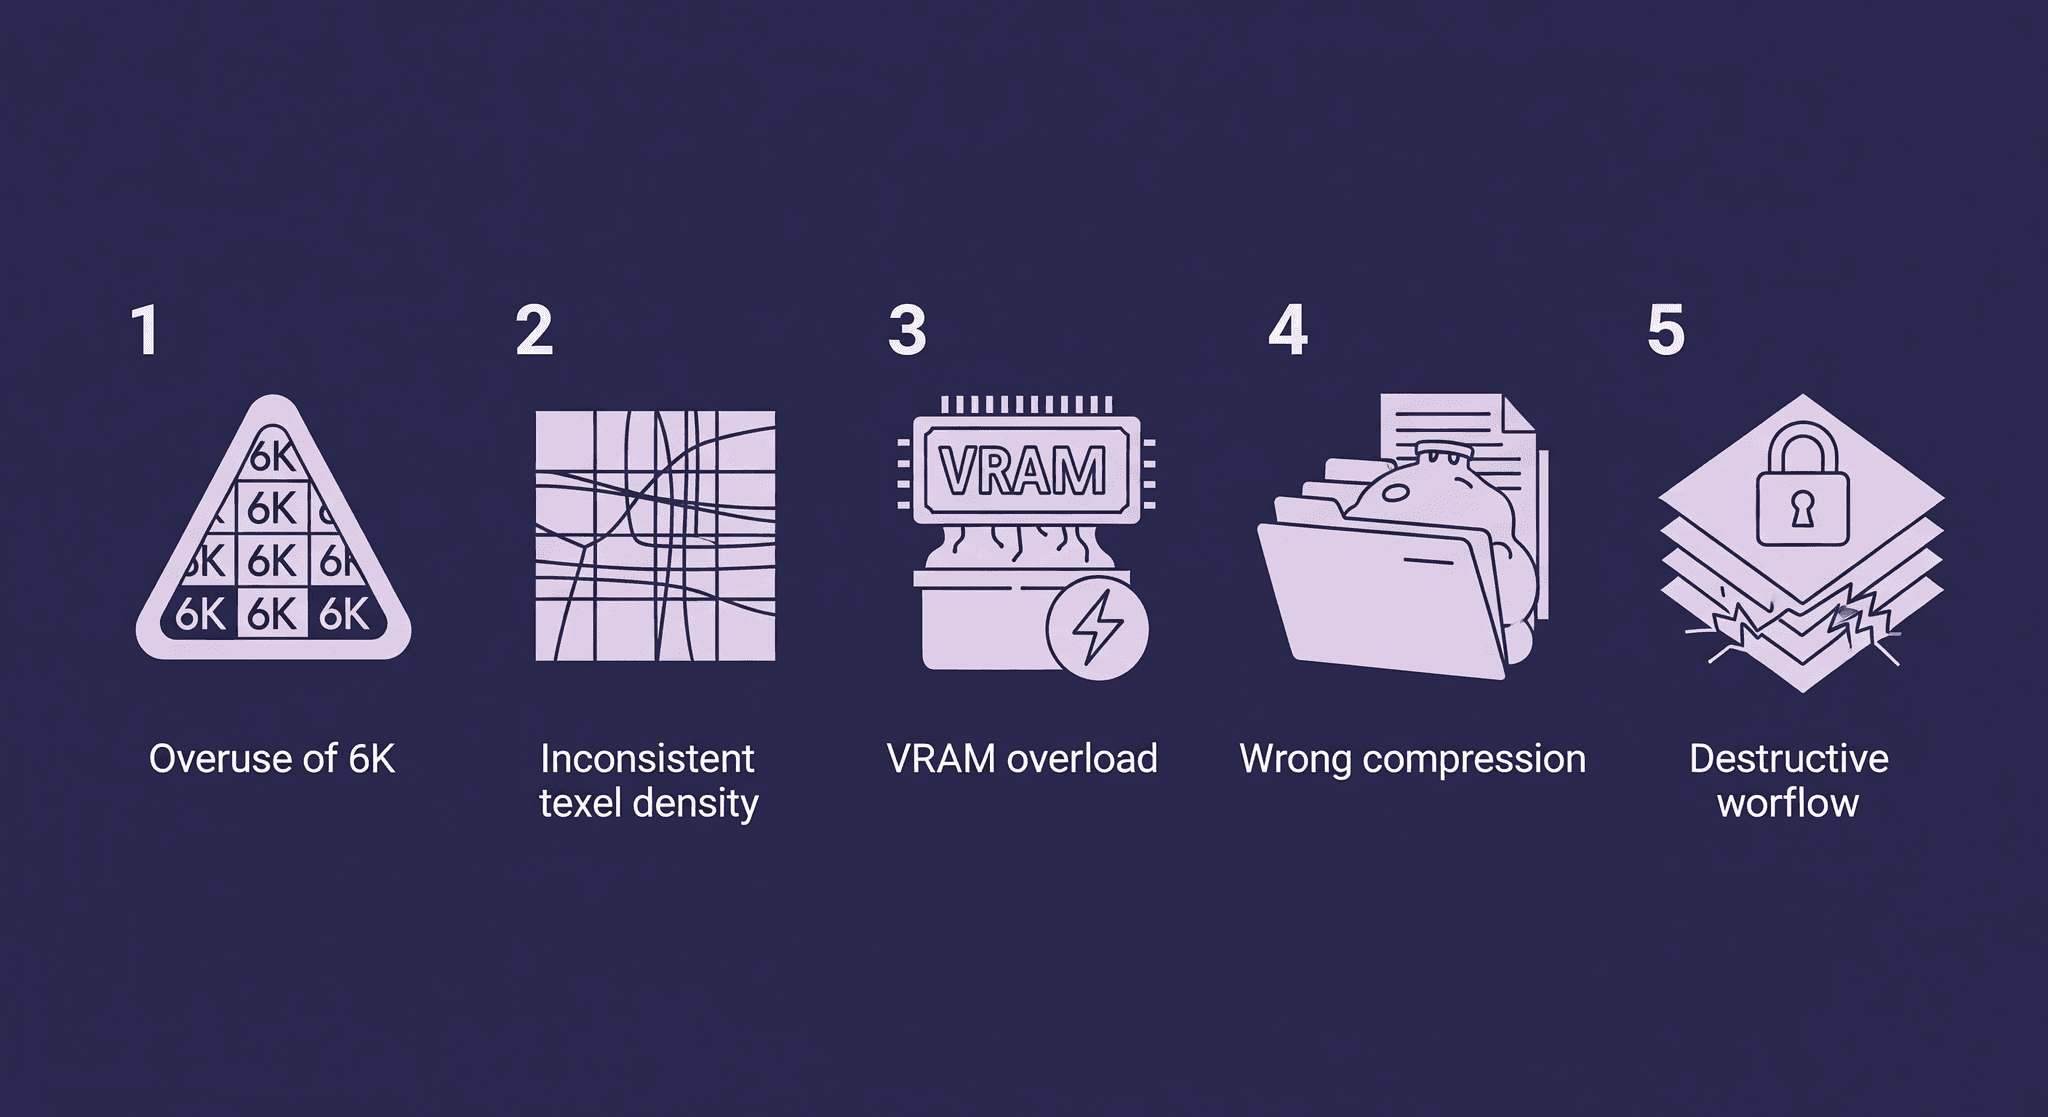
5 Critical 6K Texture Mistakes That Kill Game Performance
By Max Calder | 8 August 2025 | 10 mins read
Table of contents
Table of Contents
That moment you get the green light for 6K textures is both a thrill and a shot of pure anxiety. You can already picture the stunning, photorealistic assets, but you can also feel the looming dread of blown memory budgets and performance bottlenecks that could grind the project to a halt. This guide is your pre-flight checklist to avoid that chaos. We’re going to unpack the five most common and completely avoidable mistakes teams make when implementing high-resolution textures, from subtle UV missteps to destructive workflow traps that lead to weeks of rework. Because using 6K textures smartly isn’t just about making things look good; it’s about protecting your pipeline, your performance, and your team's sanity so you can focus on the creative work that matters.

Before you dive in: The promise and peril of 6K textures
You’re here because you want your project to look incredible. And 6K textures feel like a direct path to those stunning, next-gen visuals we all chase. They promise detail so crisp you can almost feel it, turning a good-looking asset into a photorealistic hero piece. It’s the kind of quality that makes players stop and stare.
But here’s the reality check: they come with technical baggage. A lot of it. Treating a 6K texture like just another PNG is a recipe for a bottlenecked art pipeline, blown memory budgets, and performance headaches that can bring a project to its knees. We’ve seen it happen.
This guide isn’t here to tell you to avoid them. Not at all. It’s about using them smartly. Think of this as a pre-flight check. By understanding the common pitfalls upfront, you can sidestep the late-night rework sessions and keep your focus where it belongs: on the creative work. Let’s unpack the five mistakes most teams make, so you don’t have to.
The 5 common 6K textures mistakes to avoid
6K textures are intoxicating. The moment you unlock that level of detail, it feels like you’ve stepped into a new era of visual fidelity. Surfaces pop, tiny imperfections come to life, and every close-up shot turns into a portfolio piece. But here’s the catch: with that power comes a minefield of ways to wreck your pipeline, tank your performance, and burn through your budget before the first asset even ships. The difference between a stunning 6K implementation and a production nightmare comes down to avoiding a handful of painfully common mistakes. This is your crash course in spotting them early, fixing them fast, and keeping your high-res ambitions from eating your project alive.
1. The "just because you can" fallacy: Using 6K on everything
The problem: You’ve got the green light for high-res assets, so the temptation is to go all out. A 6K texture for the character’s armor? Check. For their boots? Check. For the small, insignificant pouch on their belt that’s partially obscured 99% of the time? Check.
Why it's a mistake: This is the fastest way to cripple your rendering performance. Each 6K texture eats up a significant chunk of VRAM, and when you multiply that across dozens of assets, your memory budget evaporates. It’s like using a sledgehammer to hang a picture frame, total overkill. You’re forcing the engine to load and hold onto massive amounts of data for details that a player, moving at speed, will never, ever see.
The smart fix: Embrace the hero asset principle. This is a fundamental concept in visual asset optimization. Your resources are finite, so spend them where they have the most impact.
- Identify your heroes: Which assets will get the most screen time and be seen up close? A main character’s face, a key weapon in an FPS, a cinematic centerpiece, these are your candidates for 6K.
- Be ruthless with the rest: Everything else, background props, distant environmental pieces, secondary character details can and should use lower resolutions (4K, 2K, or even 1K). The goal is a smart, tiered approach to texture resolution that aligns with artistic priority.
Once you’ve mastered asset triage, the next technical hurdle is making sure that beautiful 6K texture is actually pulling its weight on the model itself.
2. The technical breakdown: Ignoring texel density & UVs
The problem: You’ve meticulously crafted a gorgeous 6K texture. You apply it to your model, but something’s off. The detail looks sharp on the character’s chest plate, but gets soft and blurry on the shoulder pads. Or you look at your UV layout and see huge, empty gaps of wasted space.
Why it's a mistake: This is one of the most common and frustrating 6K texture mistakes. An amazing texture is only as good as the UV map it’s applied to. If your UV shells are scaled inconsistently, you’re not getting the benefit of that high resolution. It results in uneven detail across the asset, which immediately breaks the illusion of realism. Wasted UV space is literally wasted memory and texture data you’re paying the performance cost of 6K without getting the full visual reward.
The smart fix: Plan your UVs around a consistent texel density. Texel density is the measure of how many texture pixels (texels) are used per meter of in-game space. A uniform density ensures your texture resolution appears consistent across the entire model and even across different assets in a scene.
- Use visualization tools: Before you even start texturing, use a UV checker map in your 3D application (like Maya or Blender) to see how your shells are scaled. The squares should be roughly the same size everywhere on the model.
- Optimize your layout: Pack your UV shells efficiently to minimize empty space. Think like you’re cutting shapes from a sheet of expensive fabric you want to use every inch. This discipline is a core pillar of texture mapping best practices.
- Scale based on importance: You can strategically break the uniform density rule for hero assets. Give more UV space (and thus more detail) to a character’s face and less to the soles of their boots.
Getting your texels in a row is half the battle. The other half is making sure the engine can handle what you’re throwing at it.
3. The performance blind spot: Forgetting about VRAM and Mipmaps
The problem: You’ve imported your perfectly UV-mapped 6K texture into the engine, and it looks fantastic in your test scene. But when you drop it into a full level with lighting, characters, and VFX, the frame rate tanks. The game stutters every time the asset comes into view.
Why it's a mistake: A single uncompressed 6K texture (6144x6144) can consume hundreds of megabytes of VRAM. It’s easy to forget that what looks like a single file on your hard drive becomes a massive memory allocation on the GPU. Without proper optimization, you’re not just balancing texture quality and rendering speed; you’re actively choosing to sacrifice speed for a level of quality that is often unnecessary at a distance.
The smart fix: First, profile your memory usage constantly. Use your engine’s built-in tools (like Unreal’s Memory Insights or Unity’s Profiler) to see exactly how much VRAM your textures are consuming. Second, and most critically, proper mipmapping should be implemented.
Think of mipmaps as a pre-calculated set of smaller, lower-resolution versions of your main texture. The engine automatically swaps them in as the object moves further from the camera. The asset up close? It gets the full 6K. A hundred meters away? The engine might use a 512px version, saving a massive amount of memory and processing power. This is the absolute cornerstone of texture resolution optimization. Modern game engines handle this automatically for the most part, but you need to ensure mipmap generation is enabled and configured correctly for your textures.
Of course, mipmaps work best when the source texture itself is stored efficiently, which brings us to the next common fumble.
4. The file-size fumble: Choosing the wrong compression & format
The problem: You save your final 6K texture as a .tga or a .png and call it a day. The file is huge, but it’s lossless, right? So the quality is perfect. Then you wonder why your game’s build size is ballooning and load times are getting longer and longer.
Why it's a mistake: Raw, uncompressed formats are great for source files but terrible for in-engine use. They lead to bloated project sizes that frustrate the entire team and result in painfully slow load times for the player. While some compression can introduce visual artifacts, using the wrong kind of compression is just as bad; it either fails to reduce memory usage effectively or degrades the quality of your hard work. This is a crucial detail in game development texture techniques.
The smart fix: Use modern, hardware-accelerated compression formats designed for real-time graphics. Your choice will depend on your target platform and the texture’s content, but a great all-around choice for high-quality assets is BC7 (Block Compression 7).
- Understand the trade-offs: BC7 offers excellent quality with a significant reduction in file size compared to uncompressed formats. It’s widely supported on PC and modern consoles. For simpler textures without an alpha channel, BC1 might suffice. For mobile, you might look into ASTC.
- Test and verify: Always check your compressed textures in-engine. Look for unwanted blocky artifacts, especially in smooth gradients or fine normal map details. Choosing the right format is a technical decision that directly impacts the final visual quality.
Fixing your file formats is a huge step. But the most costly mistake is one that happens before you even save the file.
5. The workflow trap: Painting yourself into a corner with destructive edits
The problem: You’ve spent three days in Photoshop, meticulously hand-painting a stunning 6K character texture. You’ve merged layers to keep the file size manageable and painted fixes directly on the base layers. The director walks over and says, "I love it, but can we make the leather straps 10% darker and less glossy?"
Why it's a mistake: Because you worked destructively, that small change is now a nightmare. You can’t easily isolate the leather straps. You can’t tweak the gloss value without affecting the underlying color. You’re now facing a choice: either spend hours trying to paint over your beautiful work or start from scratch. This is a workflow flaw that grinds high-resolution texture implementation to a halt.
The smart fix: Adopt a non-destructive, procedural workflow. This is non-negotiable in modern game development. Tools like Adobe Substance 3D Painter and Designer are built for this.
- Work with layers and masks: In Substance Painter, every brush stroke, material, and effect exists on its own layer. Need to change the color of the leather? Just tweak the fill layer’s color. Need to adjust roughness? Move a slider. No rework required.
- Embrace proceduralism: Substance Designer allows you to build textures from nodes, creating a graph that can be changed at any point. This approach is infinitely flexible.
- Decouple resolution from creation: When you work non-destructively, you can export your texture at any resolution you need. You can create it at 6K, then export a 4K version for the main asset, a 2K version for a background variant, and a 1K version for a mobile LOD, all from the same source file, in minutes. This flexibility is the key to an efficient, scalable, and sane texturing pipeline.
The real takeaway: From technical hurdles to creative headroom
The goal here was never to make you afraid of 6K textures. It was to reframe them. They aren't just bigger files; they're a bigger commitment, a commitment of performance, memory, and pipeline resources. The five mistakes we unpacked aren't really five separate issues. They're all symptoms of using that commitment without a plan.
But when you flip that around? When you start with a plan prioritizing your hero assets, locking in your texel density, and building your textures non-destructively, something great happens. The anxiety disappears. Those technical hurdles we talked about become a reliable, predictable part of your workflow.
And that's the real win.
It's not just about avoiding crashes or rework. It's about reclaiming your time and mental energy to focus on what you, as a director, do best: pushing the creative vision. When the technical foundation is solid, your 6K textures stop being a potential bottleneck and become what you always wanted them to be: a powerful, reliable tool for making your project look absolutely stunning.
You've got the playbook. Now go build something incredible.

Max Calder
Max Calder is a creative technologist at Texturly. He specializes in material workflows, lighting, and rendering, but what drives him is enhancing creative workflows using technology. Whether he's writing about shader logic or exploring the art behind great textures, Max brings a thoughtful, hands-on perspective shaped by years in the industry. His favorite kind of learning? Collaborative, curious, and always rooted in real-world projects.
Latest Blogs

How 4K Seamless Textures Transform Flat CG Into Tangible Fabric
PBR textures
Fabric textures

Max Calder
Nov 21, 2025

Beyond Color and Gloss: How Plastic Texture Tells Your Product's ...
Product rendering
Texture creation

Max Calder
Nov 19, 2025

Decode Plastic Material Texture: The Team Language That Prevents ...
Product rendering
Texture creation

Mira Kapoor
Nov 17, 2025
