More Detail, Fewer Polygons: The Technical Guide to Normal Maps
By Max Calder | 5 September 2025 | 13 mins read
Table of contents
Table of Contents
You’ve seen the struggle in every project: the push for photoreal detail runs headfirst into the hard wall of a 60 FPS frame budget. It's the classic trade-off that lands squarely on your desk. So how do you deliver the rich surface complexity everyone wants without wrecking performance? The answer lies in a clever lighting trick, and this guide is here to unpack the science behind it. We'll go beyond a simple definition to explore how normal maps actually work, where they fit in a modern PBR pipeline, and how you can standardize their use for your team. Because when you master the fundamentals, you move from just using a technique to truly owning it, the key to building a smarter pipeline and solving those frustrating lighting bugs before they even start.

The core problem: Faking detail without breaking performance
In modern game development and real-time rendering, detail is everything, but so is speed. Players expect richly detailed environments, intricate assets, and cinematic realism, yet hardware limitations demand efficient performance. Adding millions of polygons to achieve micro-level surface detail isn’t practical; it clogs the pipeline, slows down iteration, and crushes frame rates. The challenge for a technical artist isn’t just making things look good, it’s making them look exceptional while keeping assets optimized. This is where normal maps step in, bridging the gap between visual fidelity and real-time performance without bloating geometry.
Why can't you just add more polygons?
Start with the fundamental tension every real-time artist faces: the eternal battle between visual fidelity and performance. In a perfect world, we’d sculpt every single crack, screw, and wood grain into our models as pure geometry. But we don’t live in a perfect world; we live in a world of frame budgets, memory limits, and draw calls.
Every polygon you add to a model has a cost. The GPU has to process its vertices, the engine has to store its data in memory, and in complex scenes, the sheer number of triangles can bring even high-end hardware to its knees. For a game running at 60 frames per second, the entire scene has to be rendered in about 16 milliseconds. There’s simply no time to draw a billion-polygon character, no matter how beautiful it is.
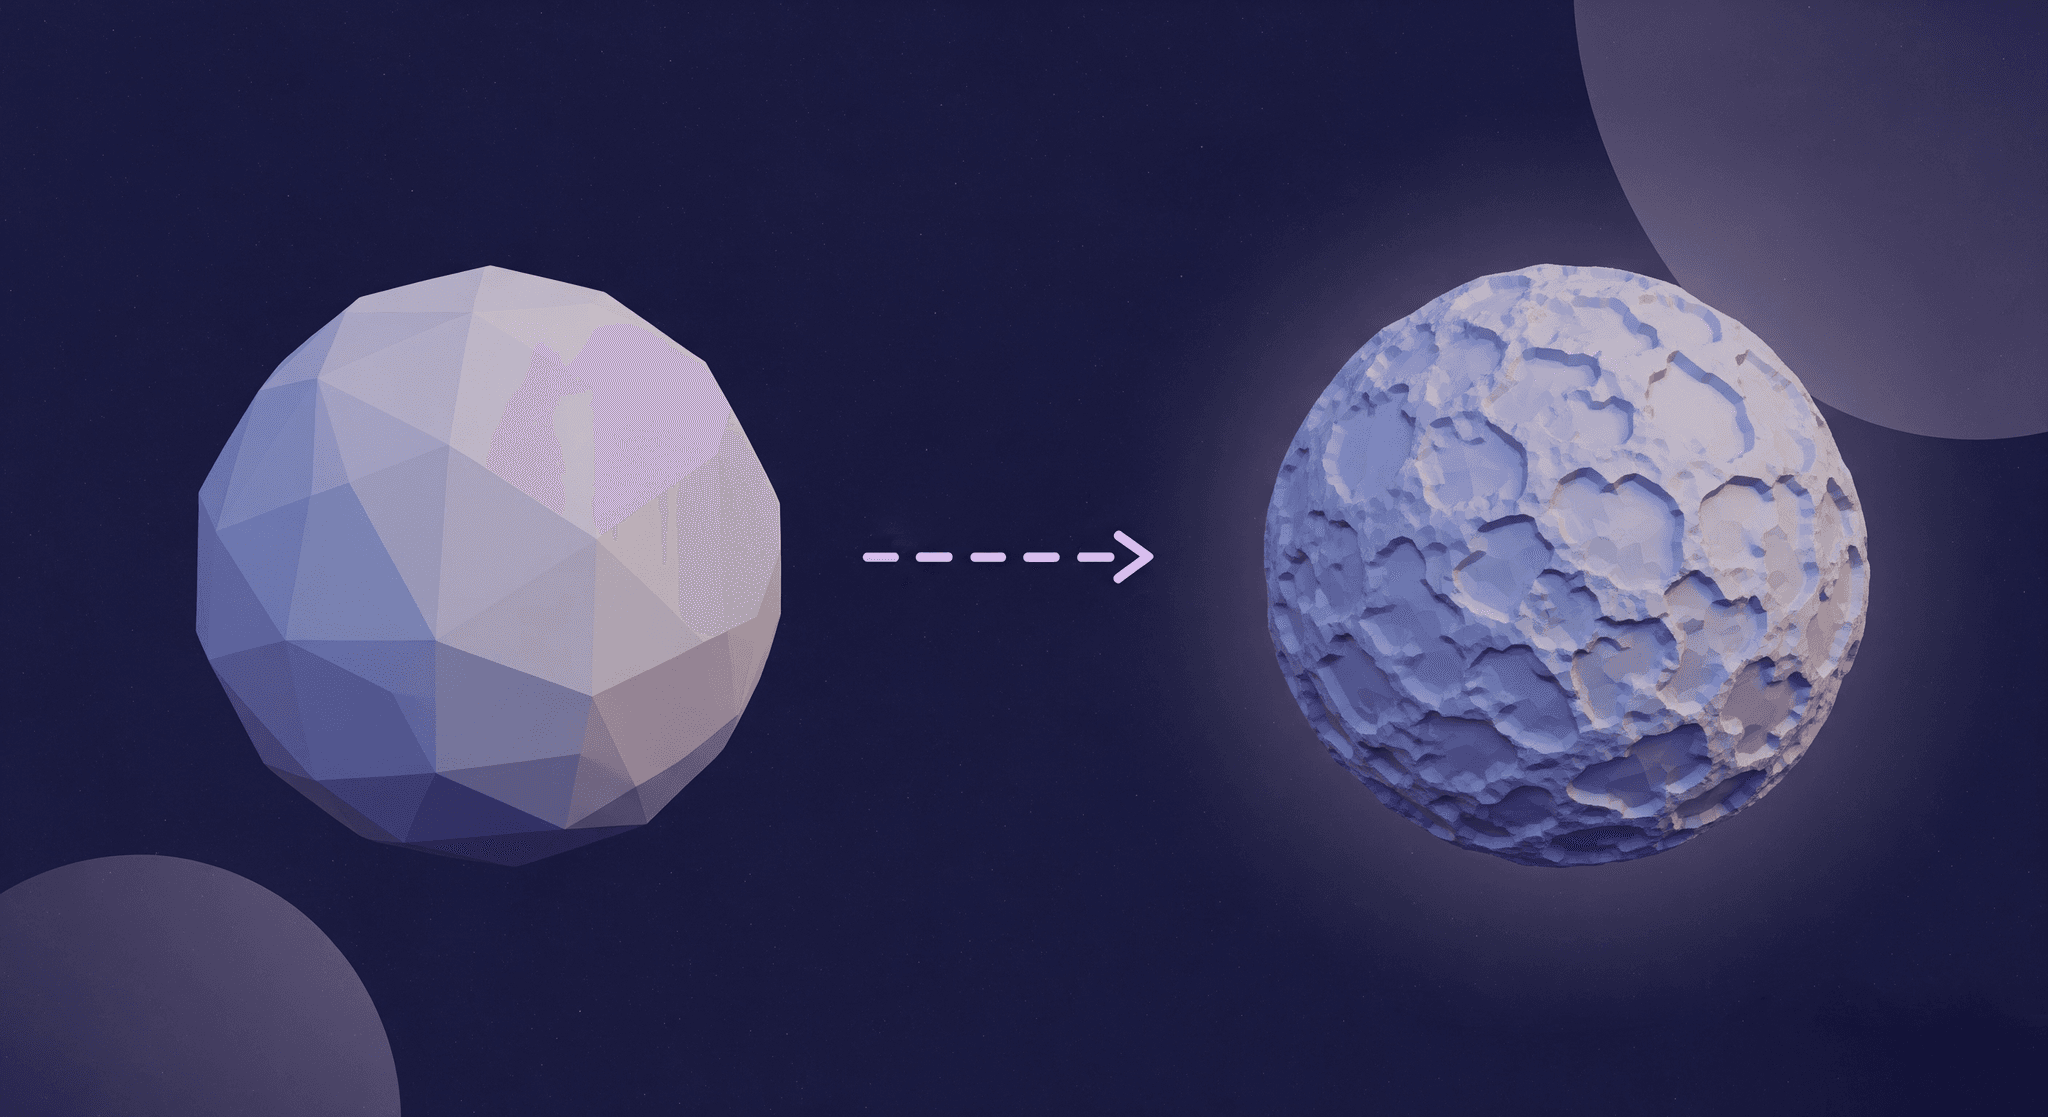
This is the core challenge that normal maps were designed to solve. They address a simple but critical need: how do we create the illusion of high-poly complexity on a low-poly, performance-friendly model? It’s not about cheating; it’s about working smarter. The goal is to decouple the surface detail from the underlying geometry, giving us the best of both worlds: rich visuals and smooth performance.
How do normal maps create surface detail without increasing geometry?
So if we’re not adding more polygons, how does a flat surface suddenly look like it has bumps, dents, and grooves? The answer is a clever lighting trick. A normal map is essentially a set of instructions, stored in an image file, that tells the game engine’s lighting system how light should bounce off a surface on a per-pixel basis.
A simple, low-poly surface has one direction it faces. Light hits it, and it bounces off uniformly. But a normal map gives the renderer a cheat sheet. For each pixel on that flat surface, the map says, “Hey, don’t treat this pixel as if it’s facing straight ahead. Instead, pretend it’s angled this way.” By manipulating the perceived angle of the surface for every single pixel, the light and shadows react as if there were real bumps and cracks there, creating the illusion of intricate detail on a model that is, geometrically speaking, still very simple.
It’s a powerful sleight of hand that forms the bedrock of modern 3D texture mapping and real-time graphics.
How normal maps actually work: The science behind the shader
Alright, so we know normal maps are a lighting trick. But to use them effectively and troubleshoot them when they go wrong, you need to understand the mechanics under the hood. It’s less magic and more math, but don’t worry, it’s straightforward.
First, a quick refresher on surface normals
Before we can fake a normal one, we have to understand what a real one is. Every polygon in your 3D model has a surface normal. Imagine your model is a pincushion. A surface normal is like a pin sticking straight out of the fabric, perpendicular to the surface at that exact point.
These normals are fundamental to lighting. When a light ray hits the surface, the angle between the light source and the surface normal determines how bright that point on the surface should be. A surface pointing directly at a light will be bright, while a surface angled away will be darker. This is why a sphere has a smooth gradient of light across its surface; its normals are gradually changing direction.
On a low-poly model, you only have normals at the vertices, and the shading is interpolated across the face. This results in a smooth but simple look. Normal maps let us override that simplicity.
Translating RGB to 3D vectors
Here’s the core concept: a normal map isn’t a color texture. It’s a data texture. The familiar purple, blue, and pink colors are just a visual representation of 3D directional vectors stored in the image’s Red, Green, and Blue channels.
It works like this:
- R (red) channel: Controls the X-axis direction (left to right).
- G (green) channel: Controls the Y-axis direction (up and down).
- B (blue) channel: Controls the Z-axis direction (in and out from the surface).
Each pixel in the normal map contains an RGB value that corresponds to an XYZ vector. The shader reads this vector and uses it instead of the underlying polygon’s actual surface normal when calculating lighting. A value of (128, 128, 255) in an 8-bit map represents a vector of (0, 0, 1), a normal pointing straight out, which appears as a flat, neutral purple. Deviations from this base color bend the light, creating the illusion of depth.
This is why it’s critical to treat normal maps as linear data, not color images. They aren’t pictures; they are shader mapping instructions in disguise.
Tangent Space vs. Object Space: What your pipeline needs
When you bake a normal map, you’ll encounter two main types: Tangent Space and Object Space. Choosing the right one is crucial for your pipeline.
- Tangent space normal maps: These are the common purple maps. The XYZ directions they store are relative to the surface of the model itself, not the world. Think of it as a local coordinate system that moves and bends with the polygon’s UVs. This makes them ideal for assets that deform, like characters, or for textures you want to reuse across multiple models. The normal directions are “tangent” to the surface.
- Object space normal maps: These maps store normal directions in coordinates relative to the object’s pivot point. They look like a rainbow of colors because they map absolute directions (e.g., world-up is always the same color). Because the directions are fixed to the object, they don’t work on deforming meshes. Their use case is narrow, typically for rigid, static models like statues or architecture, where you won’t be reusing the texture.
The Recommendation: For a modern studio pipeline, standardize on Tangent Space. It’s the industry default for a reason. It supports animation, texture reuse, and tiling detail maps. Reserve Object Space for very specific, static-only edge cases. This simple guideline will prevent countless headaches down the line.
Normal maps in action: Enhancing PBR material realism
Understanding the theory is one thing; implementing it flawlessly in a production pipeline is another. Normal maps are a team player in the world of PBR texture techniques, and making them work requires a solid workflow.
Creating your maps: The high-poly to low-poly bake
The most common and reliable way to generate a normal map is by baking it. The process involves transferring the surface detail from a high-resolution, sculpted model onto the UV layout of your optimized, low-poly game asset.
Here’s the standard workflow:
1. Model a high-poly asset: This is your source of truth, sculpted with millions of polygons to capture every detail.
2. Create a low-poly asset: This version is optimized for real-time rendering, with clean topology and efficient UVs.
3. Bake: Using software like Substance Painter, Marmoset Toolbag, or Blender, you project rays from the low-poly mesh outwards to hit the surface of the high-poly mesh. The software records the difference in surface direction and saves it as a normal map.
Key settings to standardize for your team:
- Cage distance/Max ray distance: This controls how far the rays travel. Set it too low, and you’ll get holes in your bake. Set it too high, and details from one part of the model can incorrectly project onto another (e.g., a finger baking onto the leg).
- Anti-Aliasing (AA): Always use at least 2x2 supersampling. This renders the bake at a higher resolution and then downscales it, resulting in smoother, cleaner lines and less jaggedness in your normal map.
Integrating with PBR texture techniques
A normal map never works alone. In a Physically Based Rendering (PBR) workflow, it’s the foundation of the surface structure, working in concert with other texture maps to describe a material realistically.
- Albedo: This is the base color, free of any lighting information.
- Roughness/Gloss: This controls how light scatters across the surface at a microscopic level. Is it a matte plastic or a polished chrome?
- Metallic: This defines whether a material is a metal or a non-metal (dielectric).
Your normal map provides the meso-scale detail, the stuff that’s big enough to cast a shadow or catch a glint of light, like the grain of wood or the seams on leather. The roughness map then adds the micro-scale variation on top of that. A convincing material needs both. The normal map creates the structure that the roughness and metallic maps can then bring to life.
Best practices for creating and implementing normal maps
To avoid common issues and ensure consistency, here are some essential best practices:
- Mind your UV seams: Place UV seams along hard edges or in areas where they are less visible. A normal map can’t easily hide a poorly placed seam on a smooth, curved surface.
- Use the right compression: Don’t use standard texture compression (like DXT1/BC1) for normal maps. It will create ugly, blocky artifacts. Use BC5 (also known as 3Dc). It’s a two-channel format designed specifically for maps like these. It stores the R and G channels with high precision, and the engine calculates the B channel on the fly. This provides the best balance of quality and performance.
- Set the correct color space: This is non-negotiable. Normal maps contain mathematical vectors, not colors. In your engine (like Unreal or Unity), you must flag the texture as a normal map. This ensures it’s interpreted as Linear data, not sRGB. Applying a gamma curve (sRGB) to your normal map will corrupt the vector data and result in incorrect lighting.
Optimizing and troubleshooting your surface details
Even with a solid workflow, things can go wrong. Knowing how to debug visual artifacts and make smart optimization choices is what separates a good artist from a great technical lead.
Normal maps vs. other mapping techniques
Normal maps are the workhorse of surface detail, but they aren’t the only tool in the box. Knowing when to use an alternative is key to 3D graphics optimization.
- Bump maps: The original technique. Bump maps are grayscale images that only store height information (up or down). The shader uses this to perturb the normals. They are less accurate than normal maps because they can’t represent angled or undercut details. They’re largely obsolete but useful to know about for legacy context.
- Displacement Maps (Tessellation): These are grayscale height maps that actually modify the geometry at render time, pushing vertices in or out. This creates real depth and changes the model’s silhouette, which normal maps can’t do. The downside? It’s far more performance-intensive. Use it sparingly for significant surface changes, like cobblestones on a hero asset or dramatic ground deformation, and rely on normal maps for everything else.
The rule of thumb: If the detail is small enough that it wouldn't break the silhouette of the object, use a normal map. If you need the silhouette to change, you need displacement.
Debugging common visual artifacts
Here’s a quick checklist for when your normals look wrong:
- Inverted details (Dents look like bumps): This is almost always a green channel issue. Different renderers (DirectX for Unreal, OpenGL for Blender/Unity) expect the Y-direction (Green channel) to be oriented differently. If your bake settings don’t match your engine, you’ll need to invert the green channel. Most tools have a simple checkbox for this.
- Weird shading on hard edges: This happens when the vertex normals of your low-poly model aren’t properly defined. Ensure your hard edges (smoothing groups) are set correctly before you bake. The bake must be synced with the tangent space of the final mesh used in-engine.
- Blocky or banded gradients: This is a classic sign of incorrect compression or using an 8-bit normal map for a very smooth, subtle surface. Double-check that you’re using BC5 compression and, for hero assets, consider baking at 16-bit depth to eliminate banding before compressing.
Pushing further: Detail normal maps
For next-level fidelity, you don’t always need a bigger texture. A powerful optimization technique is to layer a detail normal map on top of your base normal map.
This involves using a second, smaller, tiling texture to add high-frequency micro-surface details like fabric weave, skin pores, or metal scratches. This tiling texture is blended with your unique baked normal map in the shader.
The advantage? You can use a reasonably sized normal map (e.g., a 1K or 2K) to capture the unique forms of your asset, then add an incredible amount of perceived detail with a tiny (256x256 or 512x512) tiling map. This saves a massive amount of texture memory while making your surfaces feel far more realistic up close. It’s a technique that delivers a huge visual return for a minimal performance cost.
Putting it all together
At the end of the day, a normal map is more than just a clever performance hack or a lighting trick. It’s a conversation with the renderer, a set of precise instructions that tells light exactly how to behave on your model’s surface.
And when you truly understand that language, the vectors hiding in the RGB, the logic behind tangent space, the reason BC5 compression is non-negotiable, you move from just following a workflow to designing one. This knowledge is the key to building a smarter, more efficient pipeline.
With this foundation, you can:
- Set standards that stick, because you can explain the why behind them.
- Debug lighting issues faster, because you know exactly where to look.
- Make the right call between a normal map, displacement, or simple geometry.
This isn't about just faking detail anymore. It's about controlling it with precision. You've got the technical understanding, now you can build the pipeline that lets your team’s art truly shine.

Max Calder
Max Calder is a creative technologist at Texturly. He specializes in material workflows, lighting, and rendering, but what drives him is enhancing creative workflows using technology. Whether he's writing about shader logic or exploring the art behind great textures, Max brings a thoughtful, hands-on perspective shaped by years in the industry. His favorite kind of learning? Collaborative, curious, and always rooted in real-world projects.
Latest Blogs

A Practical Guide for How to Choose The Right Concrete Texture fo...
3D textures
PBR textures

Mira Kapoor
Apr 29, 2026

VR Textures in Unreal Engine: A Beginner’s Guide to Setup, Optimi...
3D textures
AI in 3D design

Max Calder
Apr 27, 2026

360 Environment Textures vs Traditional Textures: Key Differences...
AI in 3D design
PBR mapping

Max Calder
Apr 24, 2026
