The Ultimate Guide to Choosing PBR Texture Editing Tools
By Max Calder | 13 August 2025 | 16 mins read
Table of contents
Table of Contents
Choosing the right PBR texturing tool can feel like navigating a minefield. You've got subscription models, competing workflows, and a dozen YouTube tutorials all telling you something different, all while that deadline for your hero asset keeps creeping closer. This guide is designed to cut through that noise. We’re not here to just compare feature lists; we're going to help you match the right software to your specific workflow, solve your biggest texturing headaches, and ship beautiful work faster. Because choosing a tool isn't just about the software, it's about finding a better process that removes friction and gives you more time to actually be an artist.

Unpack your workflow needs
Before you even think about downloading a trial or watching a dozen tutorials, let's take a step back. The shiniest tool won't fix a frustrating workflow. In fact, picking the wrong one can make it worse. The goal here isn't to find the best tool; it's to find the right tool for you.
Identify your core texturing challenges
What’s the thing that makes you sigh during the texturing phase? Is it spending hours trying to hide a nasty UV seam on a hero asset? Is it the slow, painful process of iterating on a material after your director gives you feedback? Or maybe it's the struggle to keep your materials looking consistent across an entire game level.
Most artists judge software by its feature list. That's a mistake. A long list of features you'll never use is just noise. Instead, name your actual problems. Think of this as creating a personal scorecard. The right tool will get high marks for solving the things that actually slow you down.
Here are a few common pain points. See which ones resonate:
- Tiling nightmares: You spend more time fighting visible repetitions and tiling artifacts than creating the actual texture.
- Slow iteration: A simple change like adjusting the roughness on a metal requires you to manually tweak three different maps, re-export, and re-import. It turns a 30-second fix into a 10-minute chore.
- Inconsistent results: The wood texture you made for a chest looks completely different from the wood texture on the floor right next to it, even though they should be the same material.
- Destructive workflows: You make a change and, hours later, realize it was a mistake. But there’s no going back. The work is permanent, and you have to start over.
Grab a notebook (digital or physical) and write down your top two or three. These are your real non-negotiables. This scorecard is what you'll use to measure every tool we discuss. It keeps you grounded in what matters: a smoother, faster, and more creative workflow.
Define your essential features for a material creation workflow
Now that you know your pain points, let's translate them into a feature checklist. This isn't about every bell and whistle; it's about the core functionality that powers a modern material creation workflow. When you're looking at PBR texture editing software, these are the features that make a real difference.
Your checklist should include:
- Non-destructive editing: This is the big one. It’s the difference between using layers in Photoshop and painting directly on a flattened JPEG. A non-destructive workflow means you can go back and change anything at any time, adjusting the intensity of a scratch, changing a color, or swapping out a procedural noise without destroying any other part of your work. It's the foundation of fast iteration.
- Procedural generation: The ability to create complex details using mathematical rules instead of hand-painting everything. Think of generating edge wear, ambient occlusion dirt, or wood grain patterns automatically. This is a massive time-saver and the key to creating infinite variations from a single base material.
- Smart materials: These are pre-packaged materials that you can drop onto your model. But they're more than just simple textures; they intelligently adapt to the shape of your model using its baked maps (like curvature and ambient occlusion). A chipped paint smart material will automatically place paint chips on exposed edges. This is how you build a reusable asset library that compounds your efficiency over time.
- Channel packing: Modern game engines like Unreal Engine often require you to pack multiple grayscale maps (like roughness, metallic, and ambient occlusion) into the individual Red, Green, and Blue channels of a single texture file. This saves memory and improves performance. A good tool will have export presets that do this for you automatically, saving you a tedious manual process in Photoshop.
This checklist is your first line of defense. If a tool doesn't offer a solid non-destructive workflow or can't handle the exports your engine needs, it doesn't matter how cool its other features are. With your challenges and checklist in hand, you’re ready to actually look at the software.
A breakdown of PBR texture creation tools
Alright, you know what you need. The world of 3D texture editing is dominated by a few major players, but there's a thriving ecosystem of free alternatives and specialized tools that are incredibly powerful. We're not just listing them; we're matching the tool to the job.
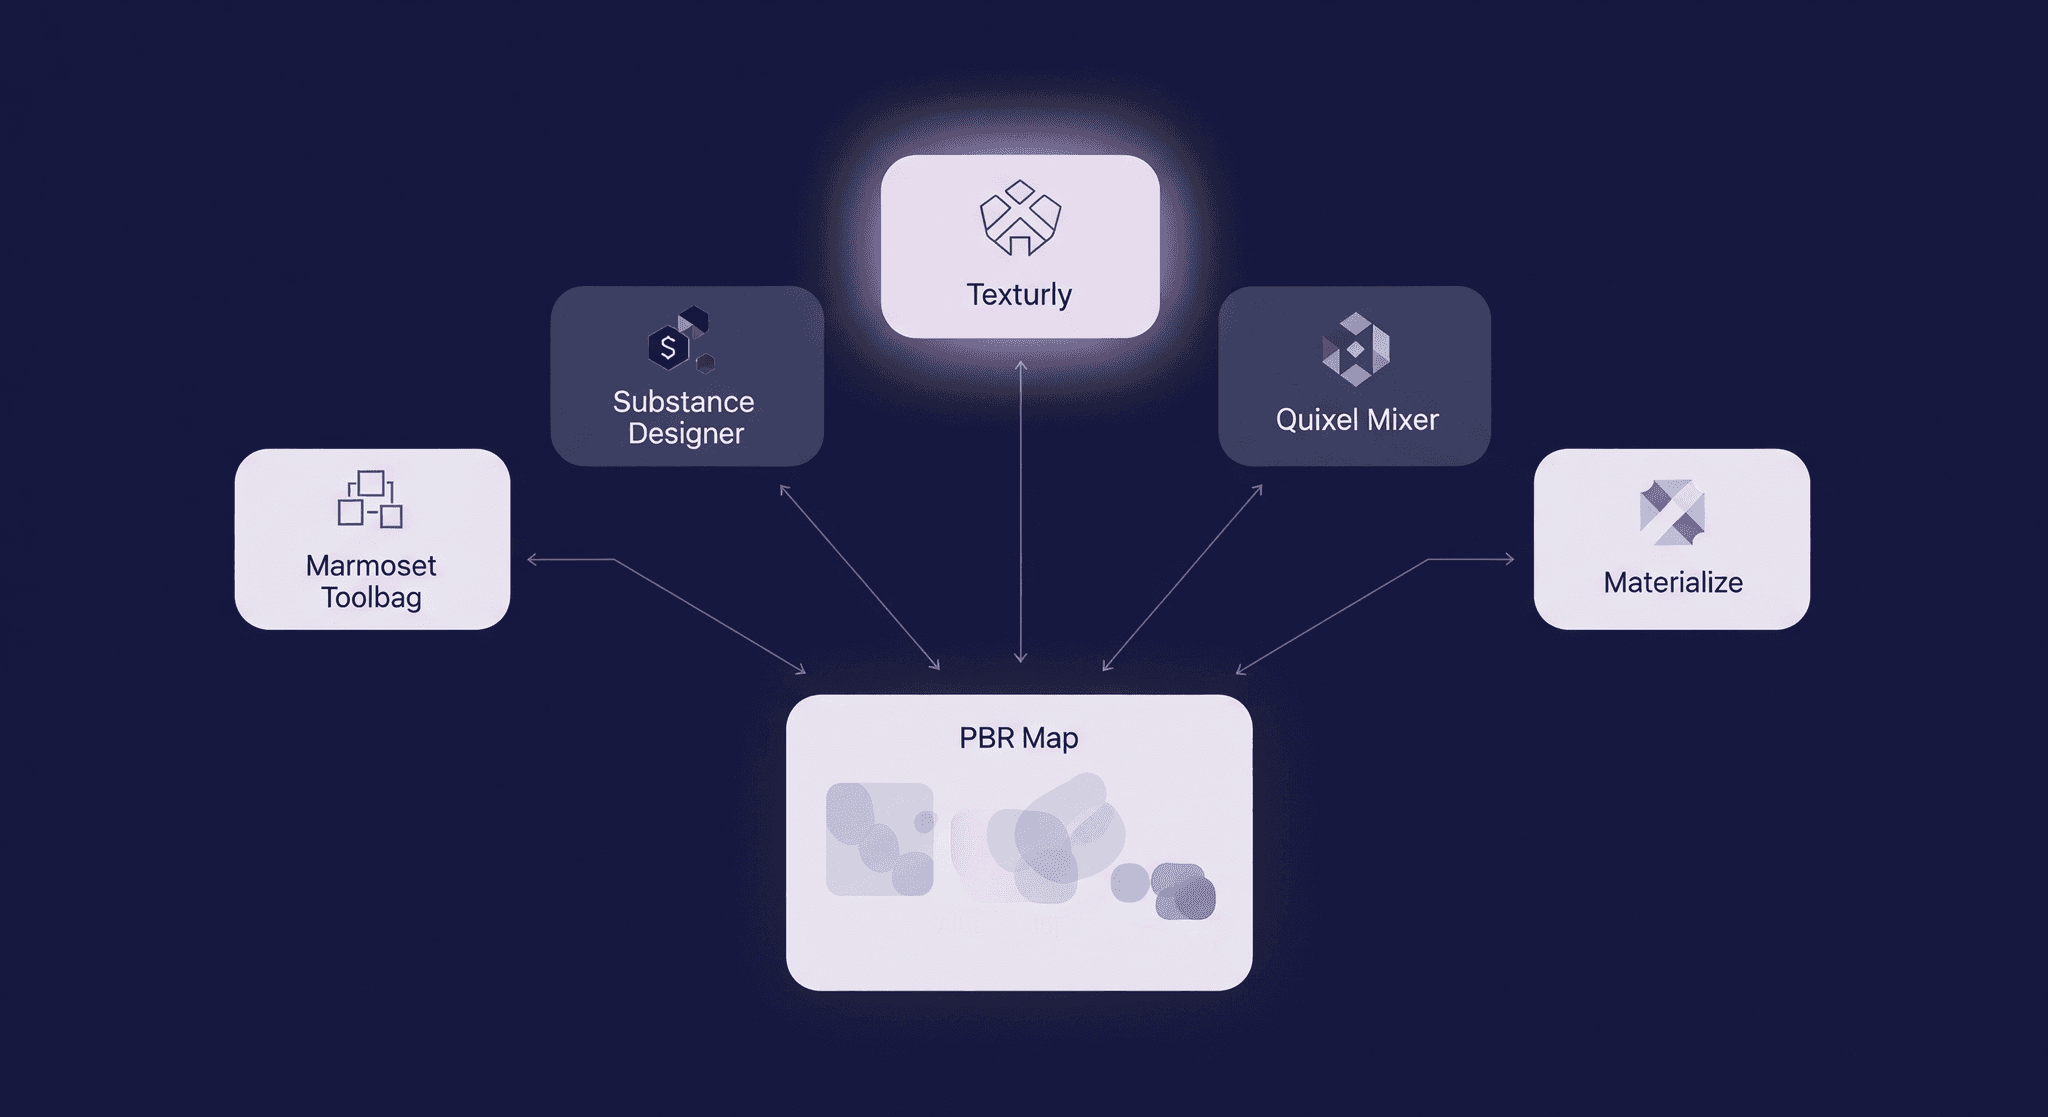
The industry standards: Substance, Quixel, Marmoset, and now, Texturly
These are the heavy hitters you’ll see in nearly every professional game studio. They’re popular for a reason, they're deep, powerful, and built for production pipelines. But there’s a new generation of tools, like Texturly, that’s redefining what’s possible in speed, automation, and creative flexibility.
Adobe Substance 3D suite (Painter & designer): This is the undisputed king of control.
- What it does best: Substance Designer is a node-based powerhouse for creating procedural materials from scratch. It's like a programming language for textures. Substance Painter is for applying those materials and adding hand-painted details directly onto your 3D model. Its layer-based system and smart material engine are second to none.
- Who it's for: The artist who needs maximum control and loves building reusable, infinitely tweakable materials. If you’re working on stylized assets or complex sci-fi surfaces, Designer gives you unparalleled power. Painter is the go-to for most game artists for its balance of proceduralism and direct, artistic painting.
Quixel mixer (+ Megascans): This is your fast track to photorealism.
- What it does best: Mixer is designed to seamlessly blend 3D scan data from the massive Quixel Megascans library. Its workflow is incredibly intuitive and fast. You can mix scanned rock, moss, and dirt to create a hyper-realistic cliffside material in minutes.
- Who it's for: Environment artists focused on realism, especially for engines like Unreal. If your goal is to create stunning, naturalistic worlds on a tight deadline, the combination of Mixer and the Megascans library is nearly impossible to beat.
Marmoset toolbag: The presentation powerhouse that grew into a texturing suite.
- What it does best: Toolbag started as the industry's favorite real-time rendering and look-dev tool. Now, it has a fantastic, GPU-accelerated baker and a full-fledged texture painting system. Its key strength is seeing your final asset, perfectly lit and rendered, as you texture it. The feedback loop is instant and beautiful.
- Who it's for: Artists who want to texture and present their work in one seamless flow. It’s particularly strong for portfolio pieces and for artists who need to bake high-poly details to low-poly models quickly and with pristine quality.
Texturly – An emerging cloud-powered texturing platform designed with speed and collaboration in mind.
- What it does best: Texturly specializes in generating high-resolution, seamless PBR textures, complete with automatic tileability, PBR map generation, and AI-powered material enhancement. Its cloud-based system means you can create textures in minutes without heavy local processing, and every output is production-ready for modern engines.
- Who it's for: Artists, designers, and studios who want to rapidly produce custom, high-quality textures without spending hours in manual map creation. Perfect for game development, architectural visualization, and product design teams that value speed without sacrificing detail.
The best free tools for PBR texture creation
What if your budget is zero? Don't worry. You can absolutely achieve professional results without spending a dime. The trade-off is usually in time, polish, or a more fragmented workflow. But for many, that's a trade worth making. Let's explore some of the best free software for creating PBR textures.
Materialize: This is a simple, standalone tool with one primary job: turning photographs into a full set of PBR maps. You feed it a color map (diffuse), and it helps you generate height, metallic, normal, and roughness maps. It’s straightforward, effective, and a fantastic utility to have in your back pocket.
ArmorPaint: Think of this as an open-source, lighter-weight alternative to Substance Painter. It's built on a powerful node-based system for materials and offers direct 3D painting. It's impressive for a free tool, but expect a steeper learning curve and a less polished user experience than the paid options. It's for the tinkerer who doesn't mind a bit of a DIY approach.
Blender: It's not just for modeling and animation anymore. Blender's built-in texture painting and shading node editor is incredibly powerful. You can stay within one application for your entire workflow, from model to bake to final texture. The learning curve for its node system can be steep, but for those already comfortable in Blender, it's a compelling and cost-effective option.
Pro Tip: The biggest cost of free tools isn't money; it's time. You might spend more time searching for tutorials, building your own material library from scratch, or creating workarounds for missing features. But for many artists, especially those starting out, this is a fantastic way to learn the fundamentals of PBR texturing from the ground up.
The specialists: Tools for one job done perfectly
Sometimes you don't need a massive suite; you just need a hammer. This is where specialized tools come in. Addressing the hidden insight that no single tool does everything perfectly, a smart artist builds a pipeline of complementary software. These smaller tools often fill critical gaps in your main workflow.
- For seamless textures: While Substance Designer is great for this, a dedicated tool like Awesome Tiling (a Photoshop plugin) can be a lifesaver for making photographic textures tile perfectly without complex node graphs.
- For photogrammetry: Software like Agisoft Metashape or RealityCapture is the industry standard for generating 3D models from photos. Your texturing workflow then begins with cleaning up the resulting mesh and textures in Blender or ZBrush.
- For baking: While the big suites have great bakers, some artists still swear by dedicated tools like XNormal for its speed and specific handling of cages, especially in complex production pipelines.
Think of your workflow like a workshop. You have your main workbench (Substance, Mixer, or Blender), but you also have a drawer full of specialized chisels, clamps, and saws. Combining these tools is often the secret to a truly efficient pipeline.
Making the call: A professional PBR texture editing tools comparison
Okay, you've seen the options. Now comes the hard part: making a choice. This section is about putting the tools head-to-head in practical scenarios. We'll move beyond feature lists and look at how these apps actually feel to use for the tasks you do every day.
Compare key workflows side-by-side
The way you prefer to work should heavily influence your choice. Compare the three main approaches to see which of the tools for editing PBR textures aligns with your style and project demands.
Procedural generation (The architect's approach):
- Tool of choice: Substance Designer.
- Workflow: You build materials from the ground up using a graph of nodes. It’s highly technical and abstract, but it offers infinite control and resolution independence. You can create a master graph for sci-fi panel and generate hundreds of unique variations just by changing a few sliders.
- Best for: Reusable materials, hard-surface detailing, environments that require lots of variation without repetition (e.g., floor tiles, brick walls, fabrics).
Hand-painting & smart materials (The painter's approach):
- Tools of choice: Substance Painter, Marmoset Toolbag, ArmorPaint.
- Workflow: You work directly on the 3D model in a layer-based system, much like Photoshop. You stack layers of materials, add procedural masks for wear and tear, and then top it all off with hand-painted details like scratches, text, or stains.
- Best for: Hero assets, stylized characters, props with unique stories to tell through their textures. This approach offers the most artistic control.
Photo-bashing & scan blending (The realist's approach):
- Tool of choice: Quixel Mixer.
- Workflow: You start with high-quality scan data and blend it together using layers and masks. You might mix a scanned concrete material with a scanned leakage stain and a procedural dirt mask. It's incredibly fast and intuitive.
- Best for: Hyper-realistic environments, natural surfaces (rock, mud, wood), and projects with tight deadlines where realism is key.
AI-driven texture generation & seamless tiling (The future-forward approach):
- Tool of choice: Texturly.
- Workflow: You can upload any texture image to generate perfectly seamless tiles or use AI prompts to create entirely new textures. It automatically generates all necessary PBR maps, saving time on manual work. This speeds up your workflow, making it ideal for rapid prototyping and building diverse material libraries effortlessly.
- Best for: Artists and studios who want fast, high-quality, AI-powered texture generation without complicated setups, perfect for quick iterations or unique material creation from simple prompts.
How to edit multiple PBR texture channels efficiently
This is a critical, make-or-break aspect of any modern texturing tool. If you have to manually update your albedo, then your roughness, then your metallic map for a single material change, you're wasting time. This is a workflow killer.
The mistake to avoid: Don't choose a tool that treats channels as separate images. A PBR material is a single entity where all maps work together. Your software should treat it that way.
- The gold standard (Substance Painter, Mixer): These tools are built around the concept of a material. When you paint with the Steel material, you are painting information into the albedo, metallic, and roughness channels all at once. If you adjust the Polish slider on that material, the roughness and albedo might change simultaneously. This is how you work fast.
- The integrated approach (Marmoset Toolbag, ArmorPaint): These also use a material-based system. You work with layers that contain all the PBR channels, ensuring that your edits are cohesive and efficient.
- The automated approach (Texturly): This tool takes the pain out of PBR map creation by generating the full suite of PBR maps albedo, roughness, metallic, normal, and more from a single base map automatically. This means instead of juggling multiple channel files, you start with one high-quality base map. It’s a huge time saver and ensures all your channels stay perfectly in sync without manual intervention.
- The manual approach (Photoshop, older workflows): Without specialized plugins, managing PBR channels in a traditional 2D program is cumbersome. You have separate documents or layer groups for each channel, and you have to remember to update all of them in sync. It's slow, error-prone, and not recommended for serious PBR work.
Check compatibility with your rendering engine
A beautiful texture is useless if it renders incorrectly in your game engine or final renderer. Compatibility is not a feature; it's a requirement.
Look for export presets: The tools Substance Painter, in particular have a dropdown menu of export presets for virtually every engine and renderer imaginable (Unity, Unreal, V-Ray, Arnold, etc.). You select your target engine, and it automatically packs and names the textures exactly as the engine expects them. This saves an enormous amount of time and prevents technical headaches.
Understand the maps: Know what your engine needs. Unity uses a Metallic/Smoothness workflow. Unreal uses a Roughness/Metallic workflow and often expects you to pack the Roughness, Metallic, and Ambient Occlusion maps into a single texture. Make sure the tool you choose can easily export to your required format.
Do a test run: Before committing to a tool, do a simple test. Create a basic material, export it using the preset for your engine, and import it. Check that it looks exactly the same. Don't wait until you've spent 40 hours on a hero asset to discover a compatibility issue.
Finalizing your choice and streamlining your pipeline
You've analyzed your needs, surveyed the field, and compared the workflows. Now it's time to make a decision and, more importantly, build a system that will pay dividends for years to come.
Balance the budget, learning curve, and project goals
There's no single right answer, only the right answer for your specific situation. Let's make this tangible. Create a simple decision matrix to cut through the noise and make your final choice.
Action: Open a spreadsheet or grab a pen. List your top 2-3 tools in the rows. In the columns, list the factors that matter to you, based on the scorecard you made earlier. Include these:
1. Core challenge solver (How well does it fix your main pain point?)
2. Workflow speed (Does its approach feel fast and intuitive to you?)
3. Engine compatibility (Does it have easy export presets for your engine?)
4. Learning curve (How long until you're proficient?)
5. Budget (Subscription, perpetual license, or free?)
Now, score each tool from 1 to 5 for each category. Don't overthink it. This isn't a scientific calculation; it's a tool for clarifying your own thoughts. The highest score points to your best-fit solution.
Build your asset library, no matter the tool
Here’s the final and most important point: the tool is temporary, but the assets and skills you build are permanent. The ultimate goal isn't just to texture one model faster; it's to become a more efficient and valuable artist over the long term.
Focus on creating a reusable library of your own. Every time you create a cool material, save it as a smart material. Every time you design a useful procedural mask, add it to your collection. Whether you're in Substance, Mixer, or Blender, the principle is the same.
This is how you compound your efficiency gains. The perfectly worn copper material you build today can be dropped onto an asset a year from now, giving you a massive head start. Your library becomes your personal texturing toolkit, filled with solutions to problems you've already solved.
The outcome: A strong asset library leads directly to a stronger portfolio and faster project turnarounds. You spend less time on repetitive grunt work and more time on creative, high-impact details. That's how you not only meet your deadlines but also grow as an artist.
Your workflow is your greatest asset
So, where do you land? Whether you’re leaning towards the all-in-one power of Substance, the photoreal speed of Mixer, or a clever combination of free tools, the most important takeaway isn't the software icon you end up clicking on. It's the system you build around it.
Think of it like this: you’re not just buying a tool; you're designing your own personal workshop. Your main software is the workbench, but your true power comes from the custom jigs, specialized tools, and organized drawers you add over time. That's your asset library. That's your collection of smart materials, custom masks, and export presets.
The software will evolve. New features will be added, new competitors will emerge, and subscription models will change. But the library you build, the solutions you create for tiling, wear and tear, and channel packing is permanent. It's an investment in your own speed and creativity that pays you back on every single project.
Ultimately, the right tool is the one that gets out of your way and lets you do the work. It removes the friction between your creative vision and the final, rendered asset. Go make your choice, build your library, and spend less time fighting with software and more time making art that gets you noticed. You've got this.

Max Calder
Max Calder is a creative technologist at Texturly. He specializes in material workflows, lighting, and rendering, but what drives him is enhancing creative workflows using technology. Whether he's writing about shader logic or exploring the art behind great textures, Max brings a thoughtful, hands-on perspective shaped by years in the industry. His favorite kind of learning? Collaborative, curious, and always rooted in real-world projects.
Latest Blogs

A Practical Guide for How to Choose The Right Concrete Texture fo...
3D textures
PBR textures

Mira Kapoor
Apr 29, 2026

VR Textures in Unreal Engine: A Beginner’s Guide to Setup, Optimi...
3D textures
AI in 3D design

Max Calder
Apr 27, 2026

360 Environment Textures vs Traditional Textures: Key Differences...
AI in 3D design
PBR mapping

Max Calder
Apr 24, 2026
